Run one command → open the dashboard → your bot is live. Windows · macOS · Linux · VPS, on Docker or native.


💡 Open-source & free. A management dashboard that automates 100% of project scaffolding, deployment, and control for AI bots on Telegram · Zalo · Facebook Messenger (Discord & Lark soon) — set up in minutes, no coding needed.
- Fix: Cached Launcher Out-of-Sync: Automatically detects if the running launcher (e.g. downloaded via
npx) has a newer/different version than the cached installation inside~/.openclaw-setup, and automatically triggers an upgrade to match.
Previous: What's new in v5.8.23 (Memory Skill Integration)
- New: Long-Term Memory & Skill Auto-Evolution (learning-memory): Pre-integrates the autonomous memory and learning skill from ClawHub.
- Automatically records newly learned facts, instructions, and user preferences into
MEMORY.mdin real-time. - Enables agents to self-package and compile newly acquired behaviors and workflows into reusable
.jsandSKILL.mdfiles directly within the./skills/folder, allowing the bot to organically evolve its capabilities. - Implements OS-agnostic post-install triggers on all platforms (Docker, Windows, macOS, Linux) without requiring manual setup.
- Automatically records newly learned facts, instructions, and user preferences into
- New: UI Skill Toggle: Added the "Siêu Trí Nhớ Dài Hạn" (learning-memory) toggle option directly to the Setup Wizard interface with full installation logic support.
Previous: What's new in v5.8.22
- Infographic Poster Generator Skill: Integrates automatic infographic and poster generation via 9Router API. Automatically generates the helper script
image-generator.js(synchronizing API credentials fromopenclaw.json) and a comprehensiveSKILL.mdguiding agents on styling rules, Vietnamese font support, layouts, and image generation syntax. - Zalo Sticker & Auto-Tag Skill:
- Automatically mentions the active sender in group chats (Agent doesn't need to manually prefix with
@Nameanymore, the system handles it). - Enables agents to dynamically send Zalo stickers by appending
[Sticker: <keyword>]at the end of their text responses. - Automatically maps emotional keywords (such as
love,haha,ca khia,angry,thank you, etc.) to Zalo sticker IDs. - Generates the patch script
mentions.jsand a dedicatedSKILL.mdinside the agent's workspace.
- Automatically mentions the active sender in group chats (Agent doesn't need to manually prefix with
- Polish: Simplified TOOLS.md generation: Streamlined the
TOOLS.mdgenerator to output a concise, static guide focusing on general principles and referencing the./skills/directory. - Polish: Standardized Reference Docs list in AGENTS.md: Updated the reference docs list in the generated
AGENTS.md(for both single and relay variants in Vietnamese and English) to match the new structure, removing obsolete files (TEAMS.mdfor single-bot,BROWSER.md) and standardizing descriptions to keep exactly 9 core documents.
- 🤖 Multi-Channel — Telegram (single or multi-bot relay), Zalo Bot API, Zalo Personal, and Facebook Messenger (Discord & Lark coming soon).
- 🧑🤝🧑 Multi-Bot Team — Run multiple Telegram/Zalo bots simultaneously with synchronized workspaces and teamwork.
- 🧠 Unified AI Routing via 9Router — Easily route messages to Google Gemini, Claude, GPT-4o, OpenRouter, and Ollama (local offline models).
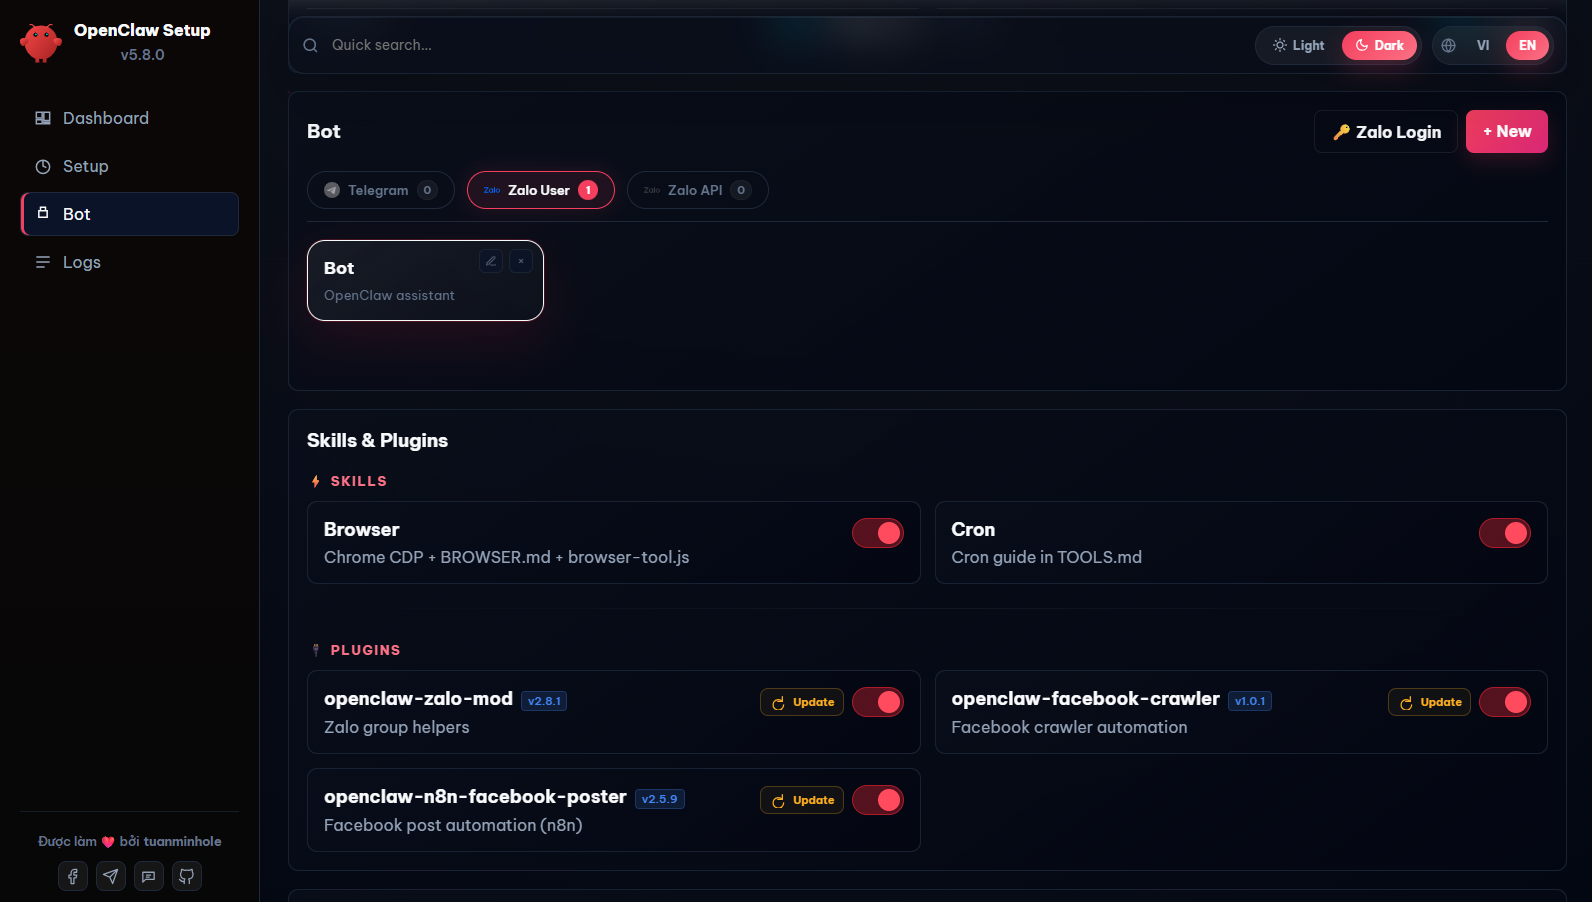
- 🧩 Built-in Skills — Web Search, Browser Automation (Chrome CDP), and Cron/Scheduler tasks.
- 🔌 Integrated Marketplace — Install advanced plugins (like
openclaw-zalo-mod, Facebook Crawler...) with a single click. - 🔀 9Router Integration — Open-source OAuth-based AI proxy that gets you up and running for free without individual API keys.
- 🔒 Safe & Private — All configurations and API keys are stored locally on your own machine.
Open your terminal and run this single command:
npx create-openclaw-botIt downloads the wizard, starts the local server, and opens the Setup UI in your browser at http://127.0.0.1:51789.
For contributors who want the full source. Run each line in order:
git clone https://github.com/tuanminhhole/openclaw-setup.git
cd openclaw-setup
npm install
npm start
Then open http://127.0.0.1:51789 if the browser doesn't open by itself.
⚠️ npm install/npm startonly work inside the clonedopenclaw-setupfolder. If you used Method 1 (npx), you did not clone the repo — use the reopen command below instead.
The first launch automatically creates a short openclaw-ui command for your OS (zsh/bash on macOS & Linux, PowerShell on Windows). Next time, just open a new terminal and run:
openclaw-uiManual command (fallback — also no re-download)
# macOS / Linux
OPENCLAW_SETUP_WIZARD=true node ~/.openclaw-setup/node_modules/create-openclaw-bot/dist/cli.js
# Windows (PowerShell)
$env:OPENCLAW_SETUP_WIZARD="true"; node "$env:USERPROFILE\.openclaw-setup\node_modules\create-openclaw-bot\dist\cli.js"npx create-openclaw-bot --update- Node.js 24 LTS (required) — the Setup wizard itself runs on Node, so it's needed for both Docker and Native modes. Download Node.js.
- Git: Installed and available in your environment PATH.
- Docker Desktop (recommended, for the bot runtime): Docker Compose V2. Download Docker.
First time? Follow these in order — no terminal needed beyond opening the UI.
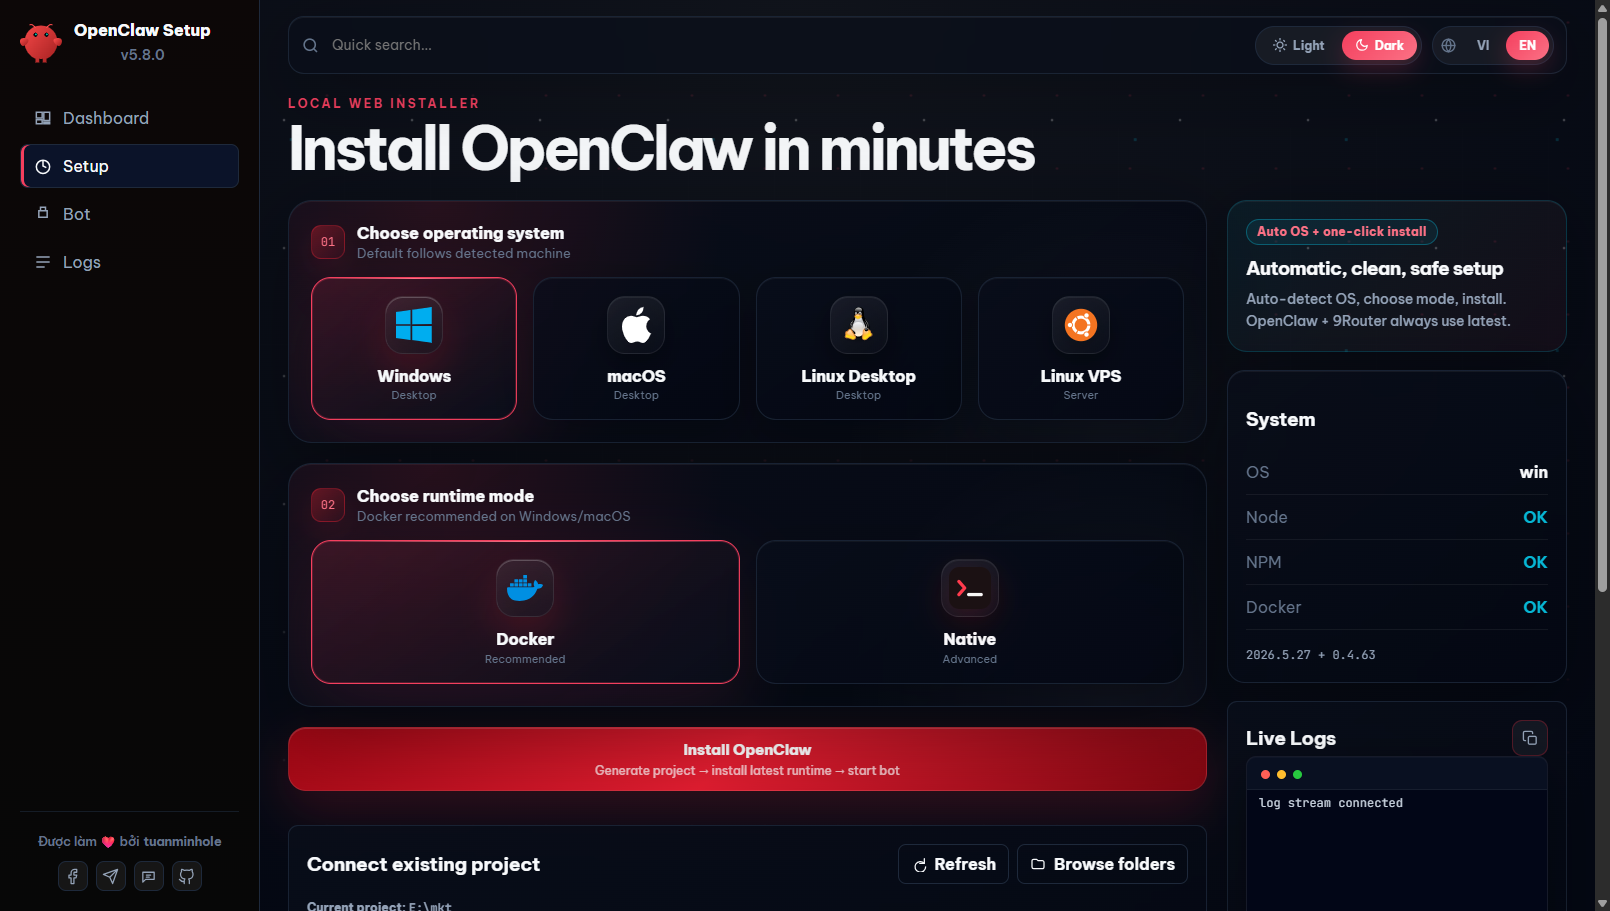
1. Open the Setup UI — run the install command above; the dashboard opens in your browser.
2. Pick OS & run mode — first make sure Node.js 24 LTS is installed (the wizard runs on Node — needed for both modes). Then open the Setup tab, choose your OS and the run mode:
- Docker (recommended) — isolated, and lets you create multiple projects/bots. Also install Docker Desktop.
- Native — lighter, runs the bot directly on the host (no Docker needed).
3. Project path & name — enter a folder path and a project name (example name: bot), then click Install. Example paths:
- Windows:
D:\bot - macOS:
/Users/<you>/bot - Linux:
/home/<you>/bot
4. Log in to 9Router — click Open 9Router website, then log in with the default password 123456.
5. Create an API key (9Router) — in Endpoints, create a new API key. Then open your project folder → openclaw.json → scroll to the models section → paste the key into the empty apiKey field and save.
6. Connect a provider (9Router) — go to Providers, pick the provider you want; it connects automatically.
7. Create the routing combo (9Router) — go to Combos, create a combo named exactly smart-route and add the models it should route to.
8. Create your bot — back in the Setup UI, choose a channel, fill in the bot info + your personal info, then click Create bot.
9. Restart & test — restart the bot container, then message your bot to test it. 🎉
- Telegram: Acquire your official Bot Token from
@BotFather. - Zalo Bot API: Obtain credentials from developers.zalo.me.
- Zalo Personal: Scan the QR authorization image displayed on the OpenClaw Dashboard.
- Facebook Messenger: Via the private
fb-messengerplugin (contact tuanminhhole to receive it) — just provide a Page token. - Discord: Coming soon.
- Lark: Coming soon.
openclaw-setup/
|-- README.md                ← English documentation (You are here)
|-- README.vi.md             ← Vietnamese documentation
|-- package.json             ← NPM entry and runner scripts
|-- dist/                    ← Compiled Web UI and CLI bundles
`-- src/                     ← Source code (UI, local API backend, build tools)
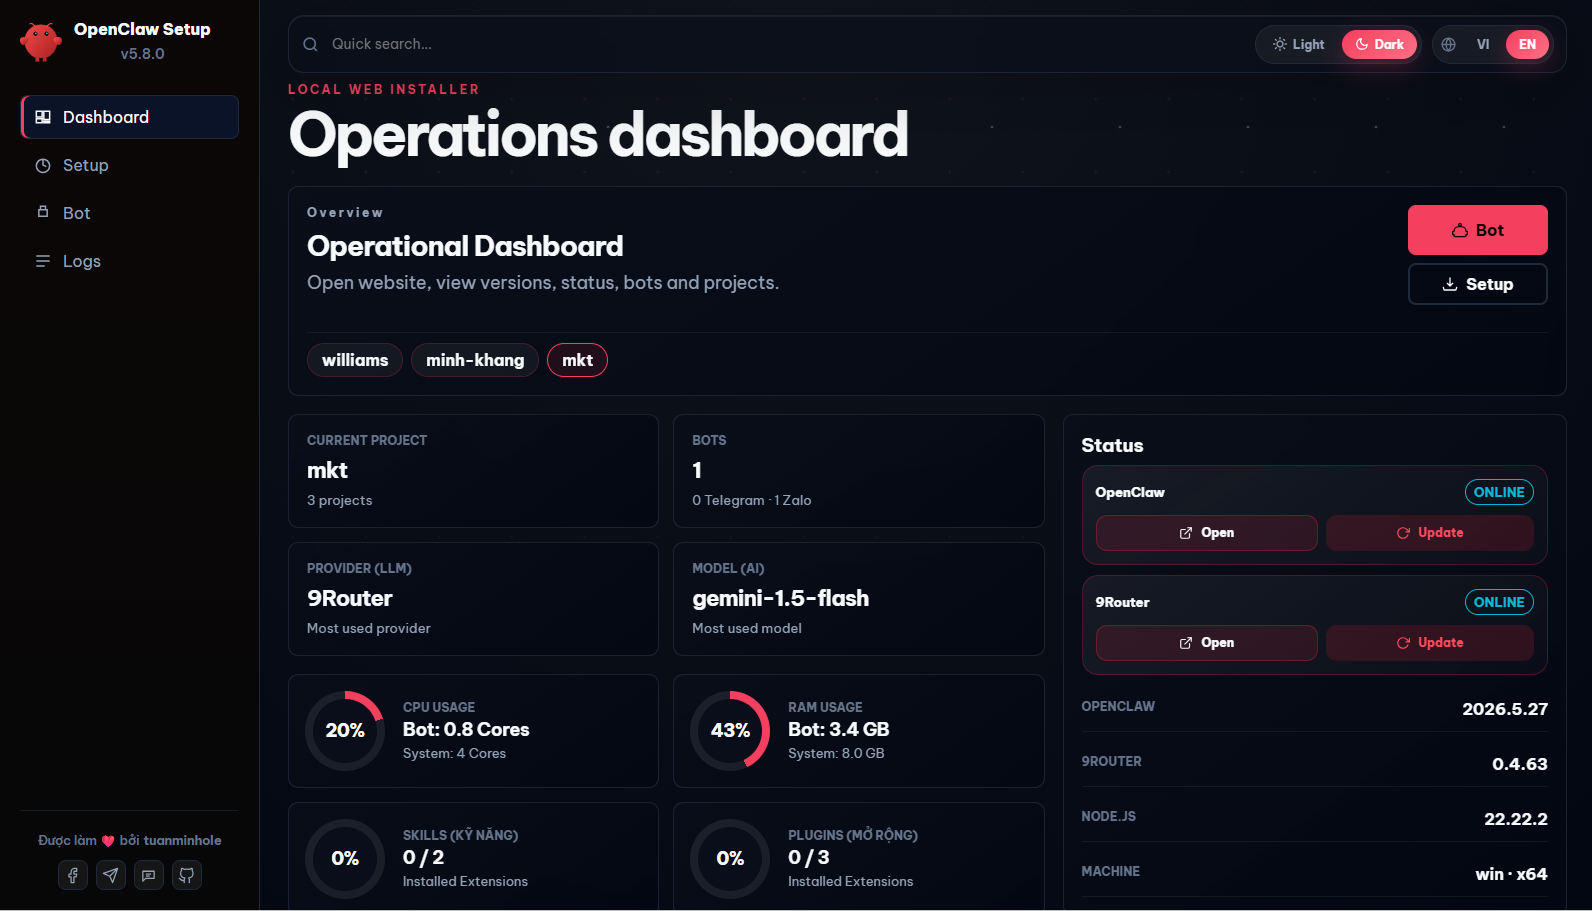
How do I start or stop the bot?
You no longer need to type terminal commands! Simply access the Setup Web UI, navigate to the Bot tab, and use the interactive Start / Stop / Recreate buttons to manage your bot lifecycle.Where do I edit the bot's persona and instructions?
You can edit them directly in your browser. Go to the Bot tab, scroll down to the Bot file tree section, and select the file you want to edit (e.g., `SOUL.md` or `AGENTS.md`). Click Save to apply changes instantly.Can I change the AI model configuration later?
Yes. You can edit the config JSON directly via the integrated File Editor in the Web UI, or re-run the setup script pointing to your existing project folder.- OpenClaw Docs
- 9Router GitHub
- Google AI Studio
- Telegram BotFather
- Zalo Developer Platform
- Docker Desktop
- ClawHub (Skills)

- OpenClaw — Core AI Gateway framework
- 9Router — Open-source AI proxy (OAuth-based, no API keys)
- ClawHub — Bot skills registry
- TheSVG — High-quality SVG brand icons
Built by tuanminhhole (Kent) as an open gift for the community. Suggestions and PRs are always welcome. If this saved you time, please ⭐ the repo so more people can find it!
Companion repos to build a complete, self-running AI assistant:
🚀 Setup & framework
- openclaw-setup — (this repo) Set up free AI bots with OpenClaw + 9Router (Telegram/Zalo/Messenger, Docker)
- vietbrain — Vietnamese "Second Brain" framework for Obsidian (AI-ready)
🔌 Plugins (runtime)
openclaw-fb-messenger— Facebook Messenger channel (private — contact to receive)- openclaw-telegram-multibot-relay — Multibot Telegram relay, delegation & native cron reminders
- openclaw-zalo-mod — Zero-token Zalo group management (slash commands, anti-spam, warn, memory)
- openclaw-browser-automation — Smart Search & Browser Automation
- openclaw-facebook-crawler — Facebook data crawler
- openclaw-n8n-facebook-poster — Auto-post to Facebook via n8n
🧩 Skills
- openclaw-skill-super-memory — Advanced long-term memory for agents
- openclaw-skill-infographic — Infographic generation
- openclaw-skill-zalo-sticker-mention — Stickers & mentions on Zalo