Type a query on the left, see the rows or the error on the right — a split-screen terminal tool for comparing how different database engines behave.
Phase 1: SQLite backend. See docs/requirements.md (or the published requirements
artifact) for the full spec, rollout phases, and open questions.
Textual TUI --> FastAPI backend --> DB adapter (translate + execute)
The TUI never talks to a database driver directly. It POSTs raw query text to a
local FastAPI server, which runs it through the active adapter's translate()
(cosmetic/parsing step — a no-op for SQL engines, real work for Mongo/Redis later)
and execute() (runs it, returns rows or an error) and logs the attempt to
~/.querymux/history.db.
QueryMUX is a Python CLI, so the recommended way to install it is
pipx — it gives querymux its own isolated
environment and puts it on your PATH without touching your system Python.
If you don't have pipx yet:
python3 -m pip install --user pipx
pipx ensurepath
Then, to install QueryMUX straight from GitHub (no clone needed):
pipx install git+https://github.com/rugbyprof/QueryMUX.git
Or, from a local clone:
git clone git@github.com:rugbyprof/QueryMUX.git
cd QueryMUX
pipx install .
Either way, once installed you can run querymux from any shell, in any
directory:
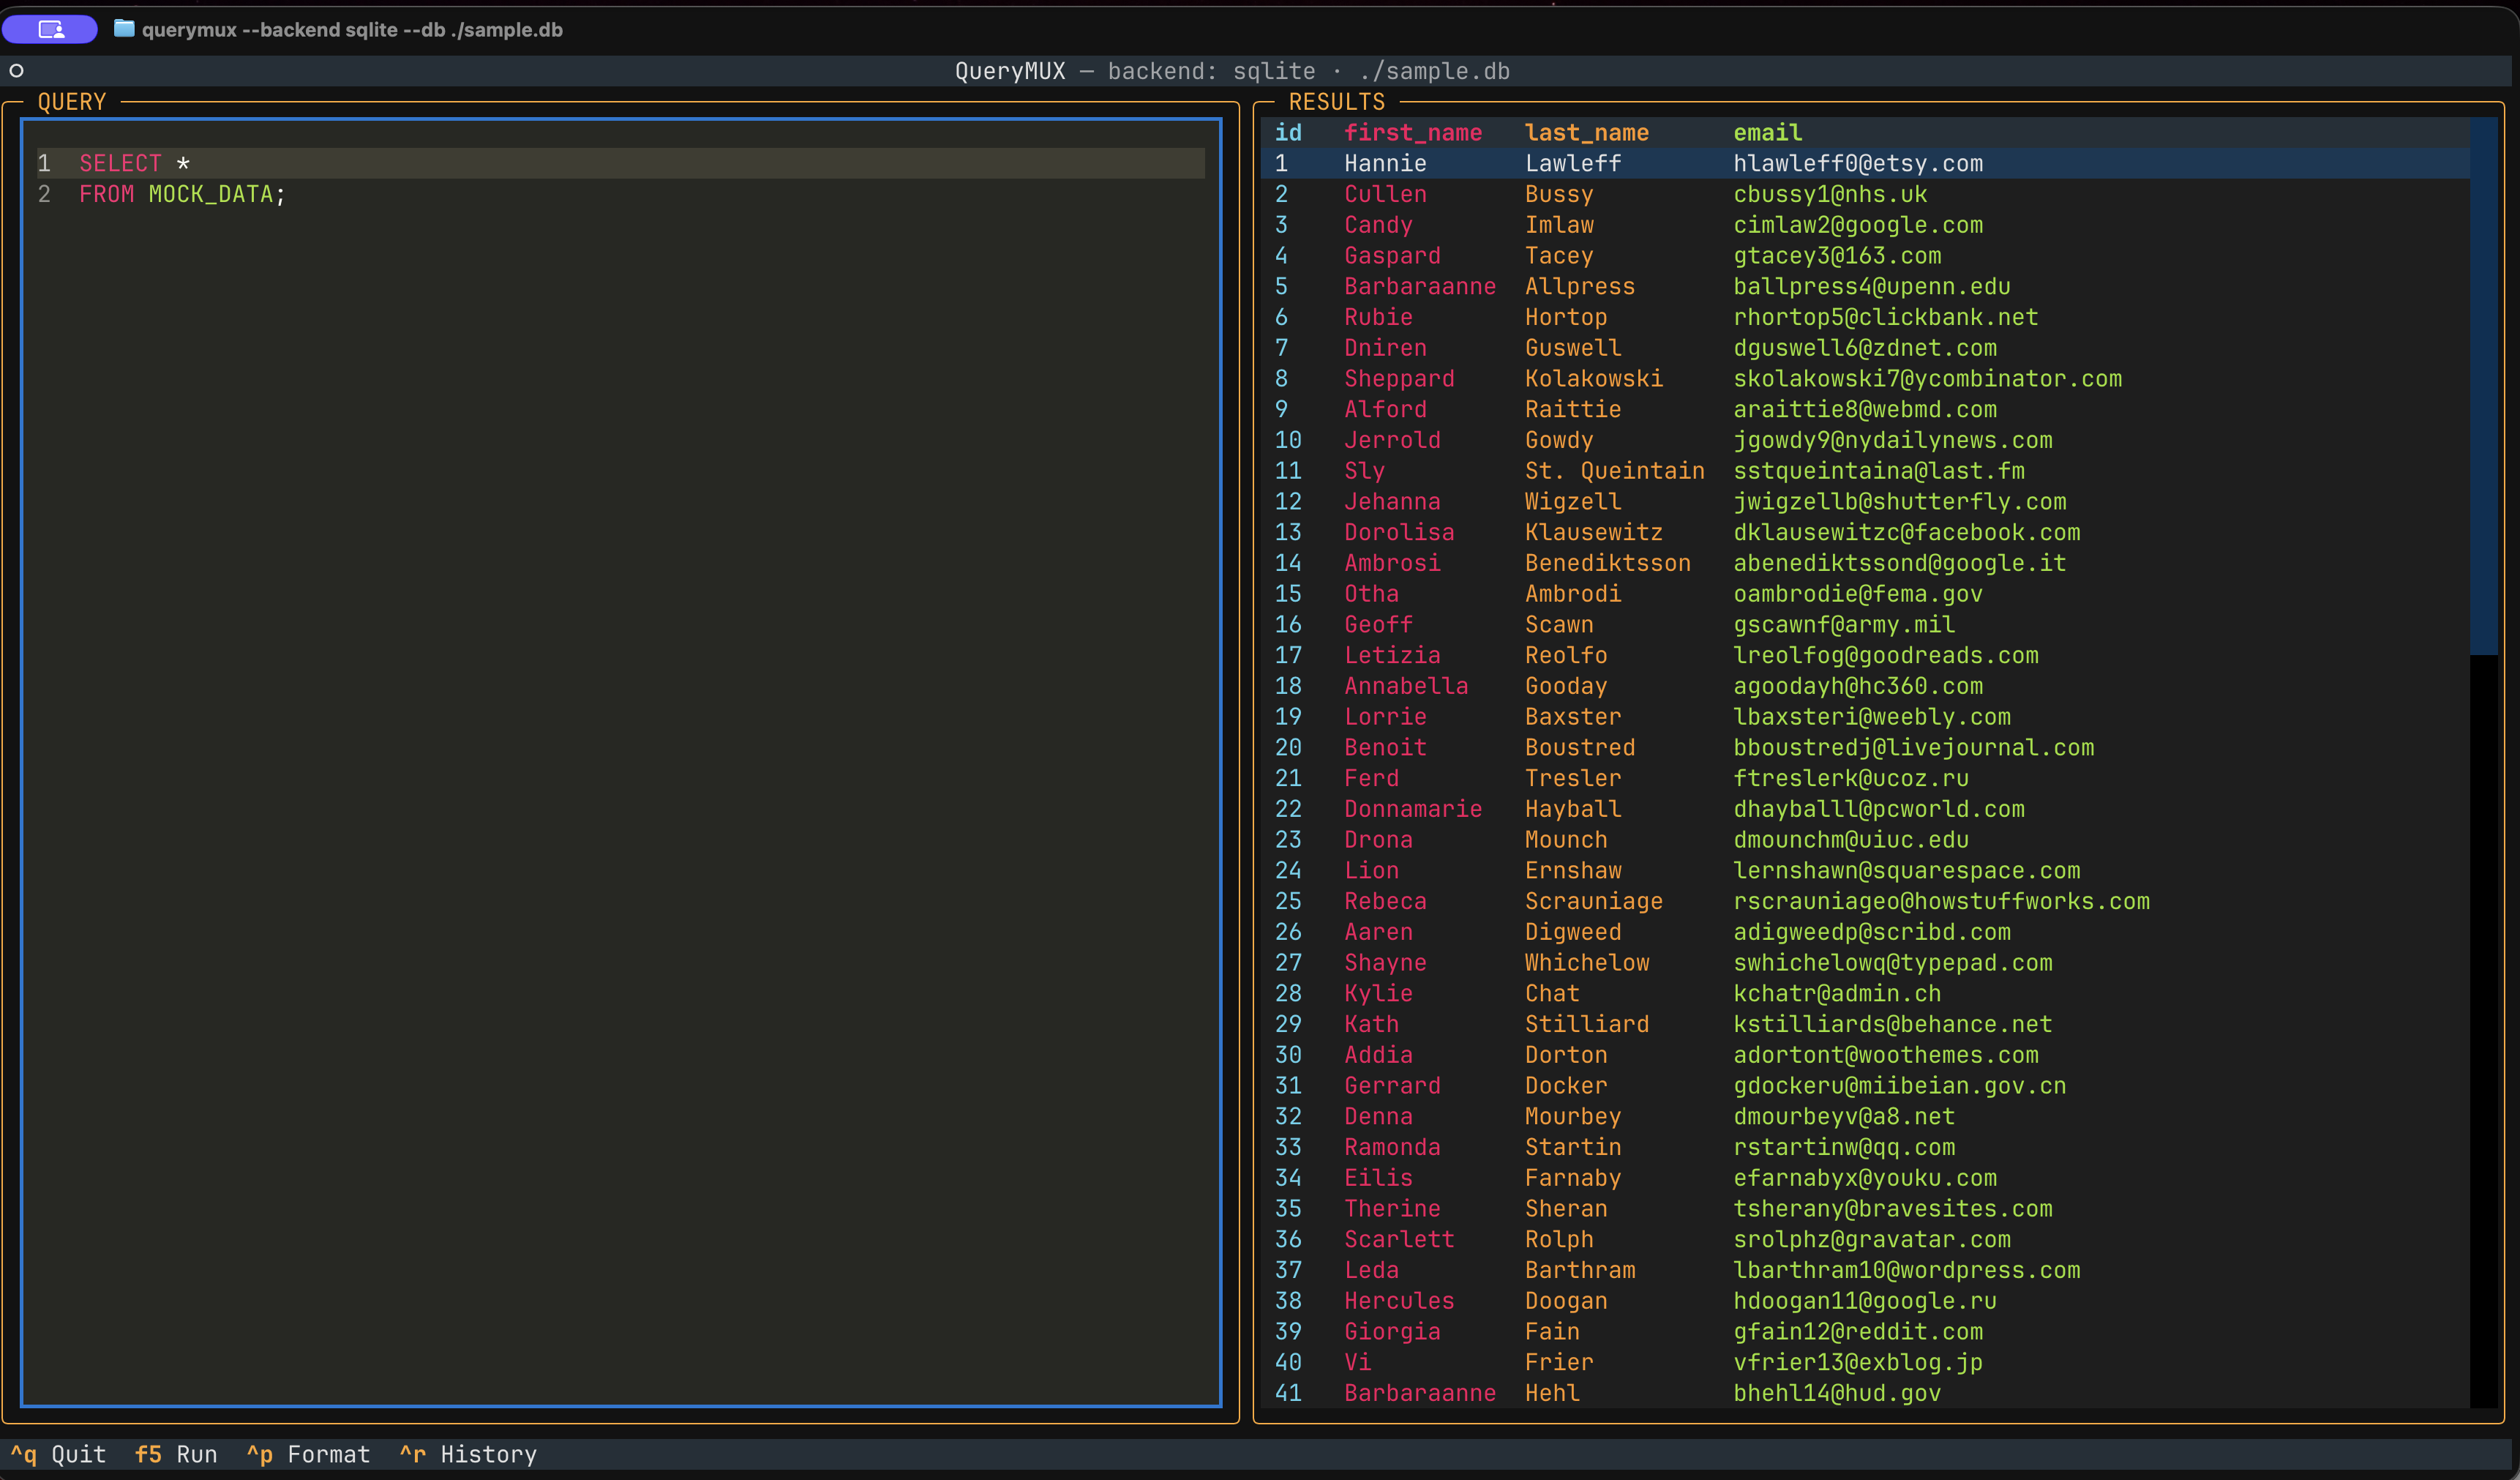
`querymux --backend sqlite --db ./sample.db`
Where:
querymuxis the command--backend sqlitechooses what adapter (db backend) to use--db ./sample.dbchooses the sqlite db file
To upgrade later: pipx upgrade querymux (or pipx reinstall querymux after
a fresh git pull if you installed from a local clone). To remove it:
pipx uninstall querymux.
If you're working on QueryMUX itself, install it editable in a venv instead so code changes take effect without reinstalling:
git clone git@github.com:rugbyprof/QueryMUX.git
cd QueryMUX
python3 -m venv .venv && source .venv/bin/activate
pip install -e .
querymux --backend sqlite --db ./sample.db
Point --db at a SQLite file that lives in a synced folder (Dropbox, OneDrive,
iCloud Drive) and you can hit a bare disk I/O error — SQLite's file locking
doesn't always get along with how those services sync in the background.
Use a plain local path.
| Key | Action |
|---|---|
| F5 / Ctrl+Enter | Run the current query (Ctrl+Enter depends on terminal support — see note below) |
| Ctrl+P | Reformat the query (uppercase keywords, one clause per line) |
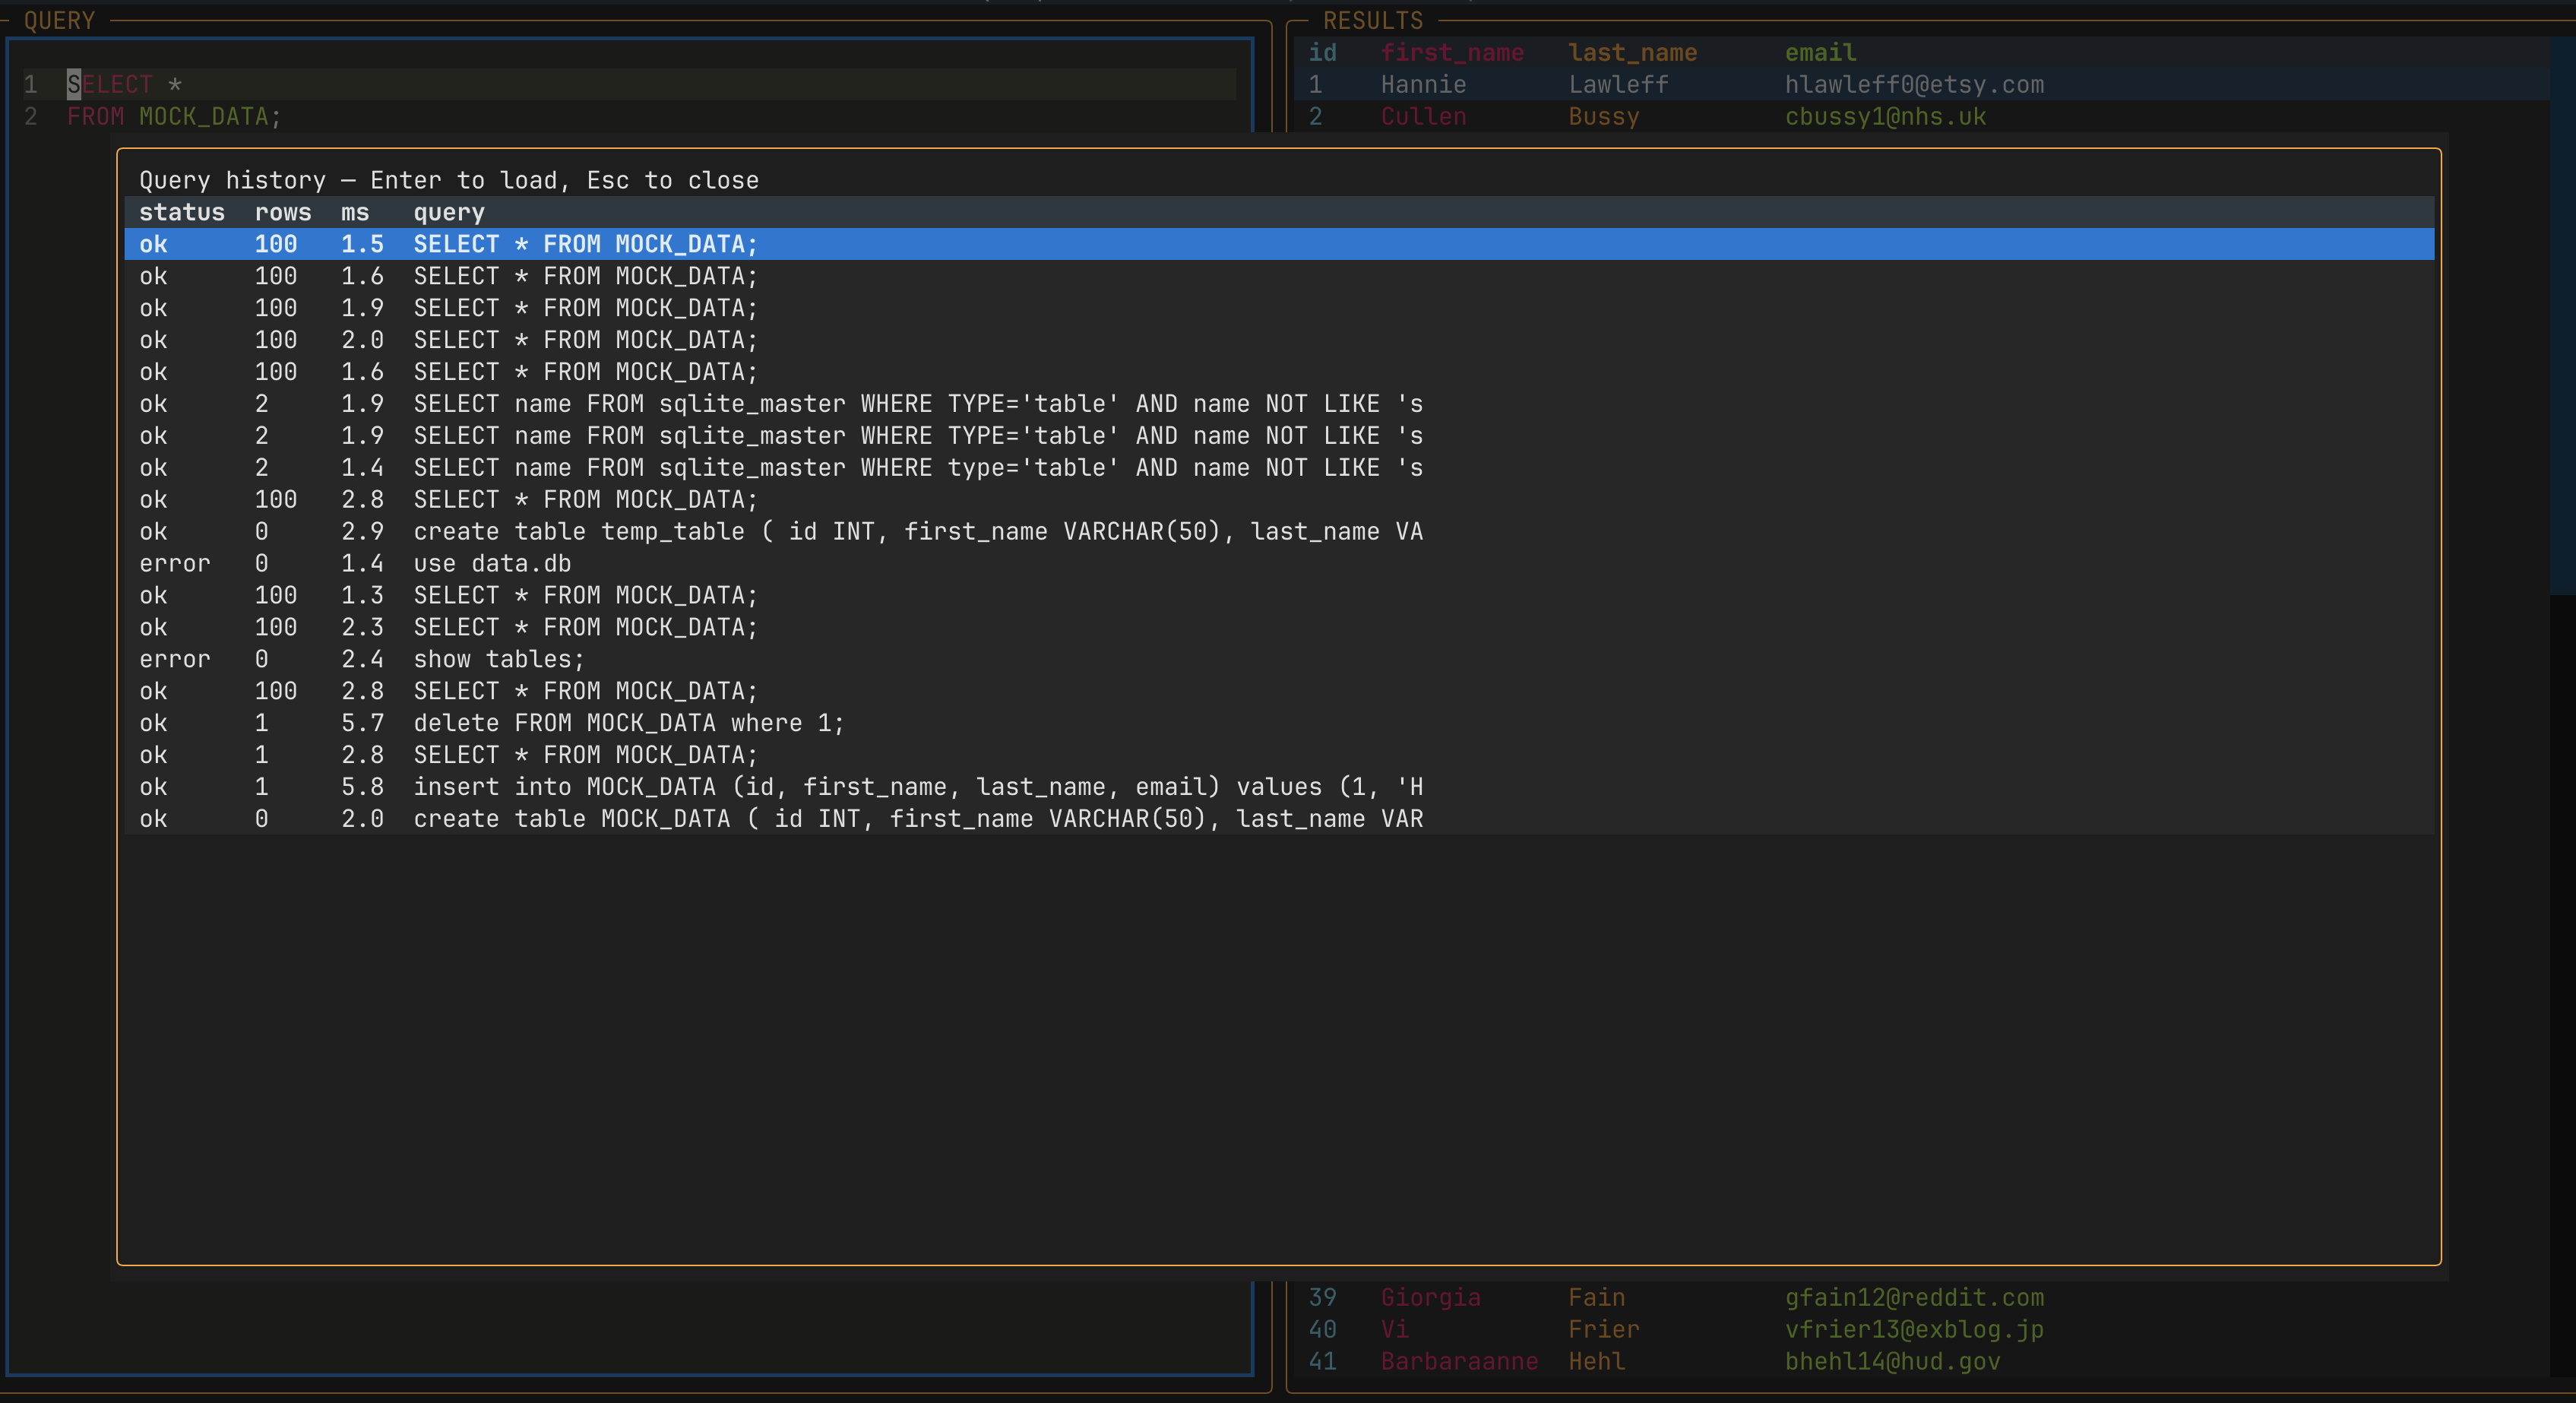
| Ctrl+R | Toggle query history |
| F9 | Toggle the debug pane (see "Debugging it" below) |
| Tab | Switch focus between panes |
| Ctrl+Q | Quit |
Note on Ctrl+Enter: many terminal emulators can't distinguish Ctrl+Enter from
plain Enter in raw input mode (no extended keyboard protocol), so it may silently
just insert a newline instead of running the query. F5 is bound to the same
action and works everywhere — treat it as the reliable default and Ctrl+Enter as
a bonus on terminals that support it (Kitty, WezTerm, some iTerm2 configs).
A DEBUG pane spans the full width below the query/results panes. It's hidden
by default — press F9 any time to show or hide it — and shows anything
printed or logged from either process:
print(...)anywhere in the code (TUI or backend) shows up live once the app has started.- The FastAPI backend runs as a separate subprocess (see Architecture
above), so its own
print()/log output is piped over and prefixed[backend]rather than being lost or corrupting the terminal. - Nothing written while the pane is hidden is lost — toggling it on shows the full backlog, not just new output.
Pass --debug to also get:
querymux --backend sqlite --db ./sample.db --debug
- The pane opens automatically on startup instead of starting hidden.
- Everything gets logged to
~/.querymux/debug.logtoo (both processes), independent of the pane — including anything printed or logged before the TUI exists, e.g. early in__main__.main(), whichprint()can't reach (there's no pane yet to catch it; a plainprint()there just flashes on the real terminal for an instant before Textual takes over the screen). Uselogging.debug(...)instead ofprint()for anything you want to survive that startup window — it's a silent no-op unless--debugis on, so it's safe to leave in the code. - The backend's own request logging goes from
warningtodebug(uvicorn --log-level debug), so it shows up too.
Tail the log file from another terminal while QueryMUX is running:
tail -f ~/.querymux/debug.log
Example output — this is what "which method ran, and when" looks like in
practice (see querymux/app.py for the logging.debug(...) calls that
produce it):
2026-09-13 12:16:07,315 DEBUG   querymux.app: QueryMuxApp.on_mount: backend=sqlite target=./sample.db api_url=http://127.0.0.1:8821
2026-09-13 12:16:07,350 DEBUG   querymux.app: action_run_query: POST http://127.0.0.1:8821/query, 15 chars
2026-09-13 12:16:08,495 DEBUG   querymux.app: action_toggle_history: pushing HistoryScreen
2026-09-13 12:16:08,512 DEBUG   querymux.app: HistoryScreen.on_mount: fetching history from http://127.0.0.1:8821
Noisy third-party chatter (httpx, httpcore, asyncio's own event-loop
logging) is deliberately kept at warning even in --debug mode, so the
file stays readable instead of drowning in per-byte HTTP tracing.