![]()


Seed your database without the hassle.
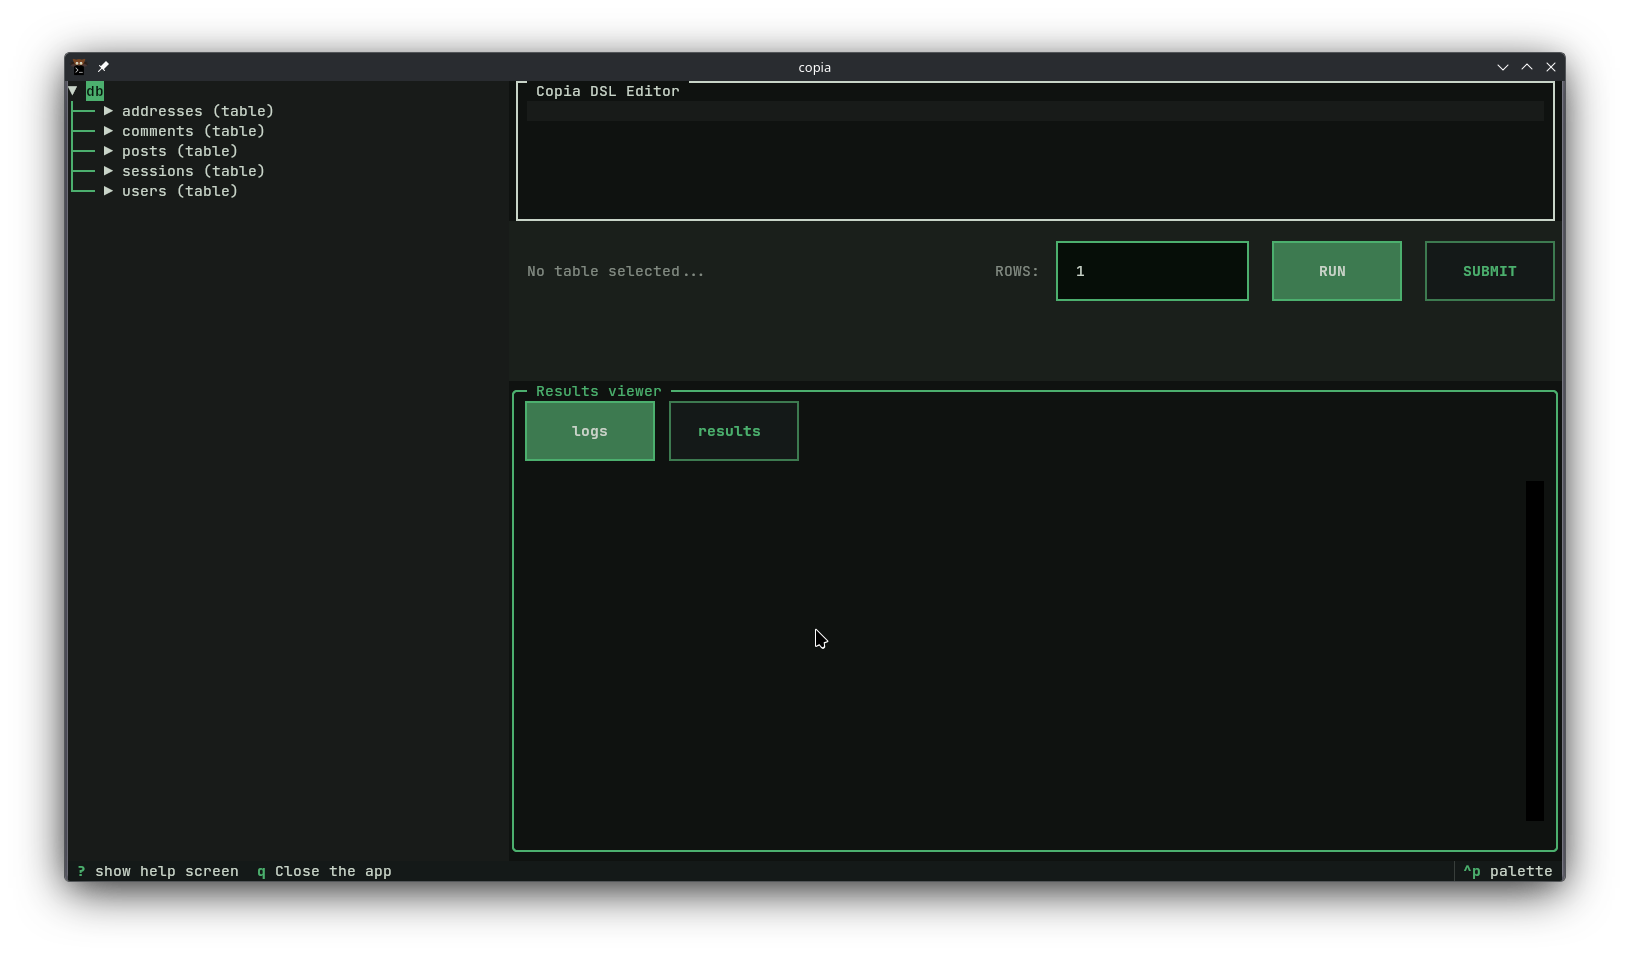
Editor, preview, and log panels — all in your terminal.
Seeding a database with realistic data is tedious. Most frameworks ship a seeder with questionable decisions, or don't ship one at all.
Copia gives you a declarative language and a TUI to describe, preview, and insert data — without boilerplate, without framework dependency.
You have this table:
CREATE TABLE users (
  id           CHAR(36)      NOT NULL PRIMARY KEY,
  username     VARCHAR(50)   NOT NULL UNIQUE,
  email        VARCHAR(255)  NOT NULL UNIQUE,
  password     VARCHAR(255)  NOT NULL,
  role         ENUM('admin', 'editor', 'viewer') NOT NULL,
  created_at   DATE          NOT NULL
);
Without Copia:
INSERT INTO users (id, username, email, password, role, created_at)
VALUES
  ('a1b2c3d4-...', 'john_doe',   'john@example.com',   '$2b$12$...', 'admin',  '2023-04-12'),
  ('e5f6g7h8-...', 'jane_smith', 'jane@example.com',   '$2b$12$...', 'editor', '2024-01-05'),
  ('i9j0k1l2-...', 'bob_99',     'bob@example.com',    '$2b$12$...', 'viewer', '2022-11-30'),
  ('m3n4o5p6-...', 'alice_w',    'alice@example.com',  '$2b$12$...', 'admin',  '2023-08-19'),
  ('q7r8s9t0-...', 'charlie_k',  'charlie@example.com','$2b$12$...', 'editor', '2024-03-02');
  -- ... 55 more rows. good luck with that.
With Copia:
id:          uuid()
username:    username()
email:       email(safe=True)
password:    password(length=16)
role:        enum('admin', 'editor', 'viewer')
created_at:  past_date()
copia run --table users users.copia --rows 60Done.
- Simple language — if you know what a function call looks like, you know the Copia DSL
- Realistic data — built on Faker, 25+ generators out of the box
- Relational-aware —
fetch('table.column')samples from existing rows, so foreign keys just work - Interactive TUI — write, preview, and insert without leaving your terminal
- Scriptable — pipe input, dump to JSON/CSV/SQL, skip confirmation prompts
pip install copia-seedRequires Python 3.10+. MySQL and MariaDB included. PostgreSQL available as an optional dependency.
copia init      # create a config file
copia tui       # launch the interactive TUI
Or run directly from the CLI:
copia run --dumps json users.copia --skip-config
echo "id:uuid() name:username()" | copia run --dumps json --skip-configFor detailed usage instructions, see the CLI documentation.
copia's main entry point is the copia command, which has several subcommands for different tasks:
copia tui: launch the interactive TUI (requires a valid config profile)copia run: parse and run a file content, with options for dumping output, skipping confirmation, and morecopia list: list all available profiles in the config filescopia init: create a new config file with a default profile
Copia config files are TOML files that define what we call "profiles".
Those profiles are just named sets of configuration values, that tell copia how to connect to the database.
a config file can have multiples profiles and usually looks like this:
[profiles.default]
adapter = "mysql"
host = "localhost"
port = 3306
database = "mydb"
user = "root"

[profiles.staging]
adapter = "postgres"
host = "staging-db.example.com"
port = 5432
database = "stagingdb"
user = "admin"
password = "Y@urRe@lly$trongP@ssw0rd"
any command that takes a profile name as an argument or flag will assume the "default" profile if the name is not provided, so in the example above, both copia tui and copia tui staging will work without issues.
copia supports two scopes for configuration profiles: global and local.
the global config file is usually located at {CONFIG_DIR}/copia/profiles.toml and is meant to store profiles that are shared across all your projects.
while the local config file is located at .copia.toml in your project directory and is meant to store profiles that are specific to that project.
In some situations, you might want to limit the search for profiles to a specific config file.
For example you might have a profile named "staging" in both your global and local config files, but with different connection details, and you want to make sure you're using the one in the global config file.
→ For more details on copia see the documentation
MIT License