Rust TWAI (Two-Wire Automotive Interface - concept conceived by Espressif, implements the CAN Bus) driver for Xiaomi CyberGear running on ESP32-S3 with esp-idf-hal.
This is a port of the C++ Arduino library to Rust for the ESP-IDF ecosystem.
- Full motor control API matching the original C++ implementation
- Support for multiple control modes: Motion, Position, Speed, and Current
- Comprehensive status feedback (position, speed, torque, temperature)
- Type-safe Rust interface with proper error handling
- Integrated with
esp-idf-halCAN/TWAI driver
Include the CyberGear driver and types in your main.rs:
use xiaomi_cybergear::XiaomiCyberGearDriver;
use xiaomi_cybergear_defs::{CyberGearMode, CyberGearStatus};Set up the TWAI (CAN) interface with 1 Mbps baudrate:
let filter = can::config::Filter::standard_allow_all();
let timing = can::config::Timing::B1M;
let config = can::config::Config::new().filter(filter).timing(timing);
let mut can_driver = can::CanDriver::new(
    peripherals.can,
    peripherals.pins.gpio43, // TX - D6 on Xiao ESP32S3
    peripherals.pins.gpio44, // RX - D7 on Xiao ESP32S3
    &config,
).unwrap();
can_driver.start().unwrap();Create and initialize the motor driver:
const CYBERGEAR_CAN_ID: u8 = 0x7F;  // CAN ID of the CyberGear motor
const MASTER_CAN_ID: u8 = 0x00;     // ESP32S3 CAN ID

let mut cybergear = XiaomiCyberGearDriver::new(
    can_driver,
    CYBERGEAR_CAN_ID,
    MASTER_CAN_ID
);

// Optional: enable debug output
cybergear.set_serial_debug(true);

// Initialize motor in position mode
cybergear.init_motor(CyberGearMode::Position);
cybergear.set_limit_speed(10.0);      // max speed 10 rad/s
cybergear.set_limit_current(5.0);     // max current 5 A
cybergear.enable_motor();
cybergear.set_position_ref(0.0); // set initial position to 0In your main loop, send commands and receive status:
loop {
    FreeRtos::delay_ms(1000);

    // Send motor command (e.g., move to new position)
    cybergear.set_position_ref(target_position);

    // Receive and process CAN messages
    while let Ok(rx_frame) = cybergear.receive(0) {
        let raw_id = rx_frame.identifier();
        if ((raw_id & 0xFF00) >> 8) == CYBERGEAR_CAN_ID as u32 {
            cybergear.process_message(&rx_frame);
        }
    }

    // Read current motor status
    let status = cybergear.get_status();
    println!(
        "POS:{:.4} V:{:.4} T:{:.4} temp:{}",
        status.position, status.speed, status.torque, status.temperature
    );

    // Request fresh status from the motor
    cybergear.request_status();
}init_motor(mode)- Initialize motor with specified control modeenable_motor()- Power on the motorstop_motor()- Stop and power off the motor
set_limit_speed(speed)- Set maximum speed (rad/s)set_limit_current(current)- Set maximum current (A)set_limit_torque(torque)- Set maximum torque (Nm)
send_motion_control(cmd)- Send position, speed, torque, and gains
set_position_kp(kp)- Set position loop proportional gainset_position_ref(position)- Set target position reference
set_speed_kp(kp)- Set speed loop proportional gainset_speed_ki(ki)- Set speed loop integral gainset_speed_ref(speed)- Set target speed reference
set_current_kp(kp)- Set current loop proportional gainset_current_ki(ki)- Set current loop integral gainset_current_filter_gain(gain)- Set current filter gainset_current_ref(current)- Set target current reference
request_status()- Request motor status from the busprocess_message(frame)- Process received CAN frameget_status()- Get last known motor status (position, speed, torque, temperature)
set_motor_can_id(id)- Change motor's CAN IDget_motor_can_id()- Get current motor CAN IDget_run_mode()- Get current motor control mode
receive(timeout)- Receive a CAN frame (blocking with timeout)read_alerts(timeout)- Read CAN bus alerts
Control motor position with proportional feedback.
Control motor speed with PI feedback.
Control motor current (torque) directly.
Advanced control with simultaneous position, speed, and torque commands with individual gains.
See src/main.rs for a complete working example that:
- Initializes the CAN bus
- Sets up the motor in position mode
- Oscillates the position reference between -10 and +10 radians
- Continuously requests and displays motor status
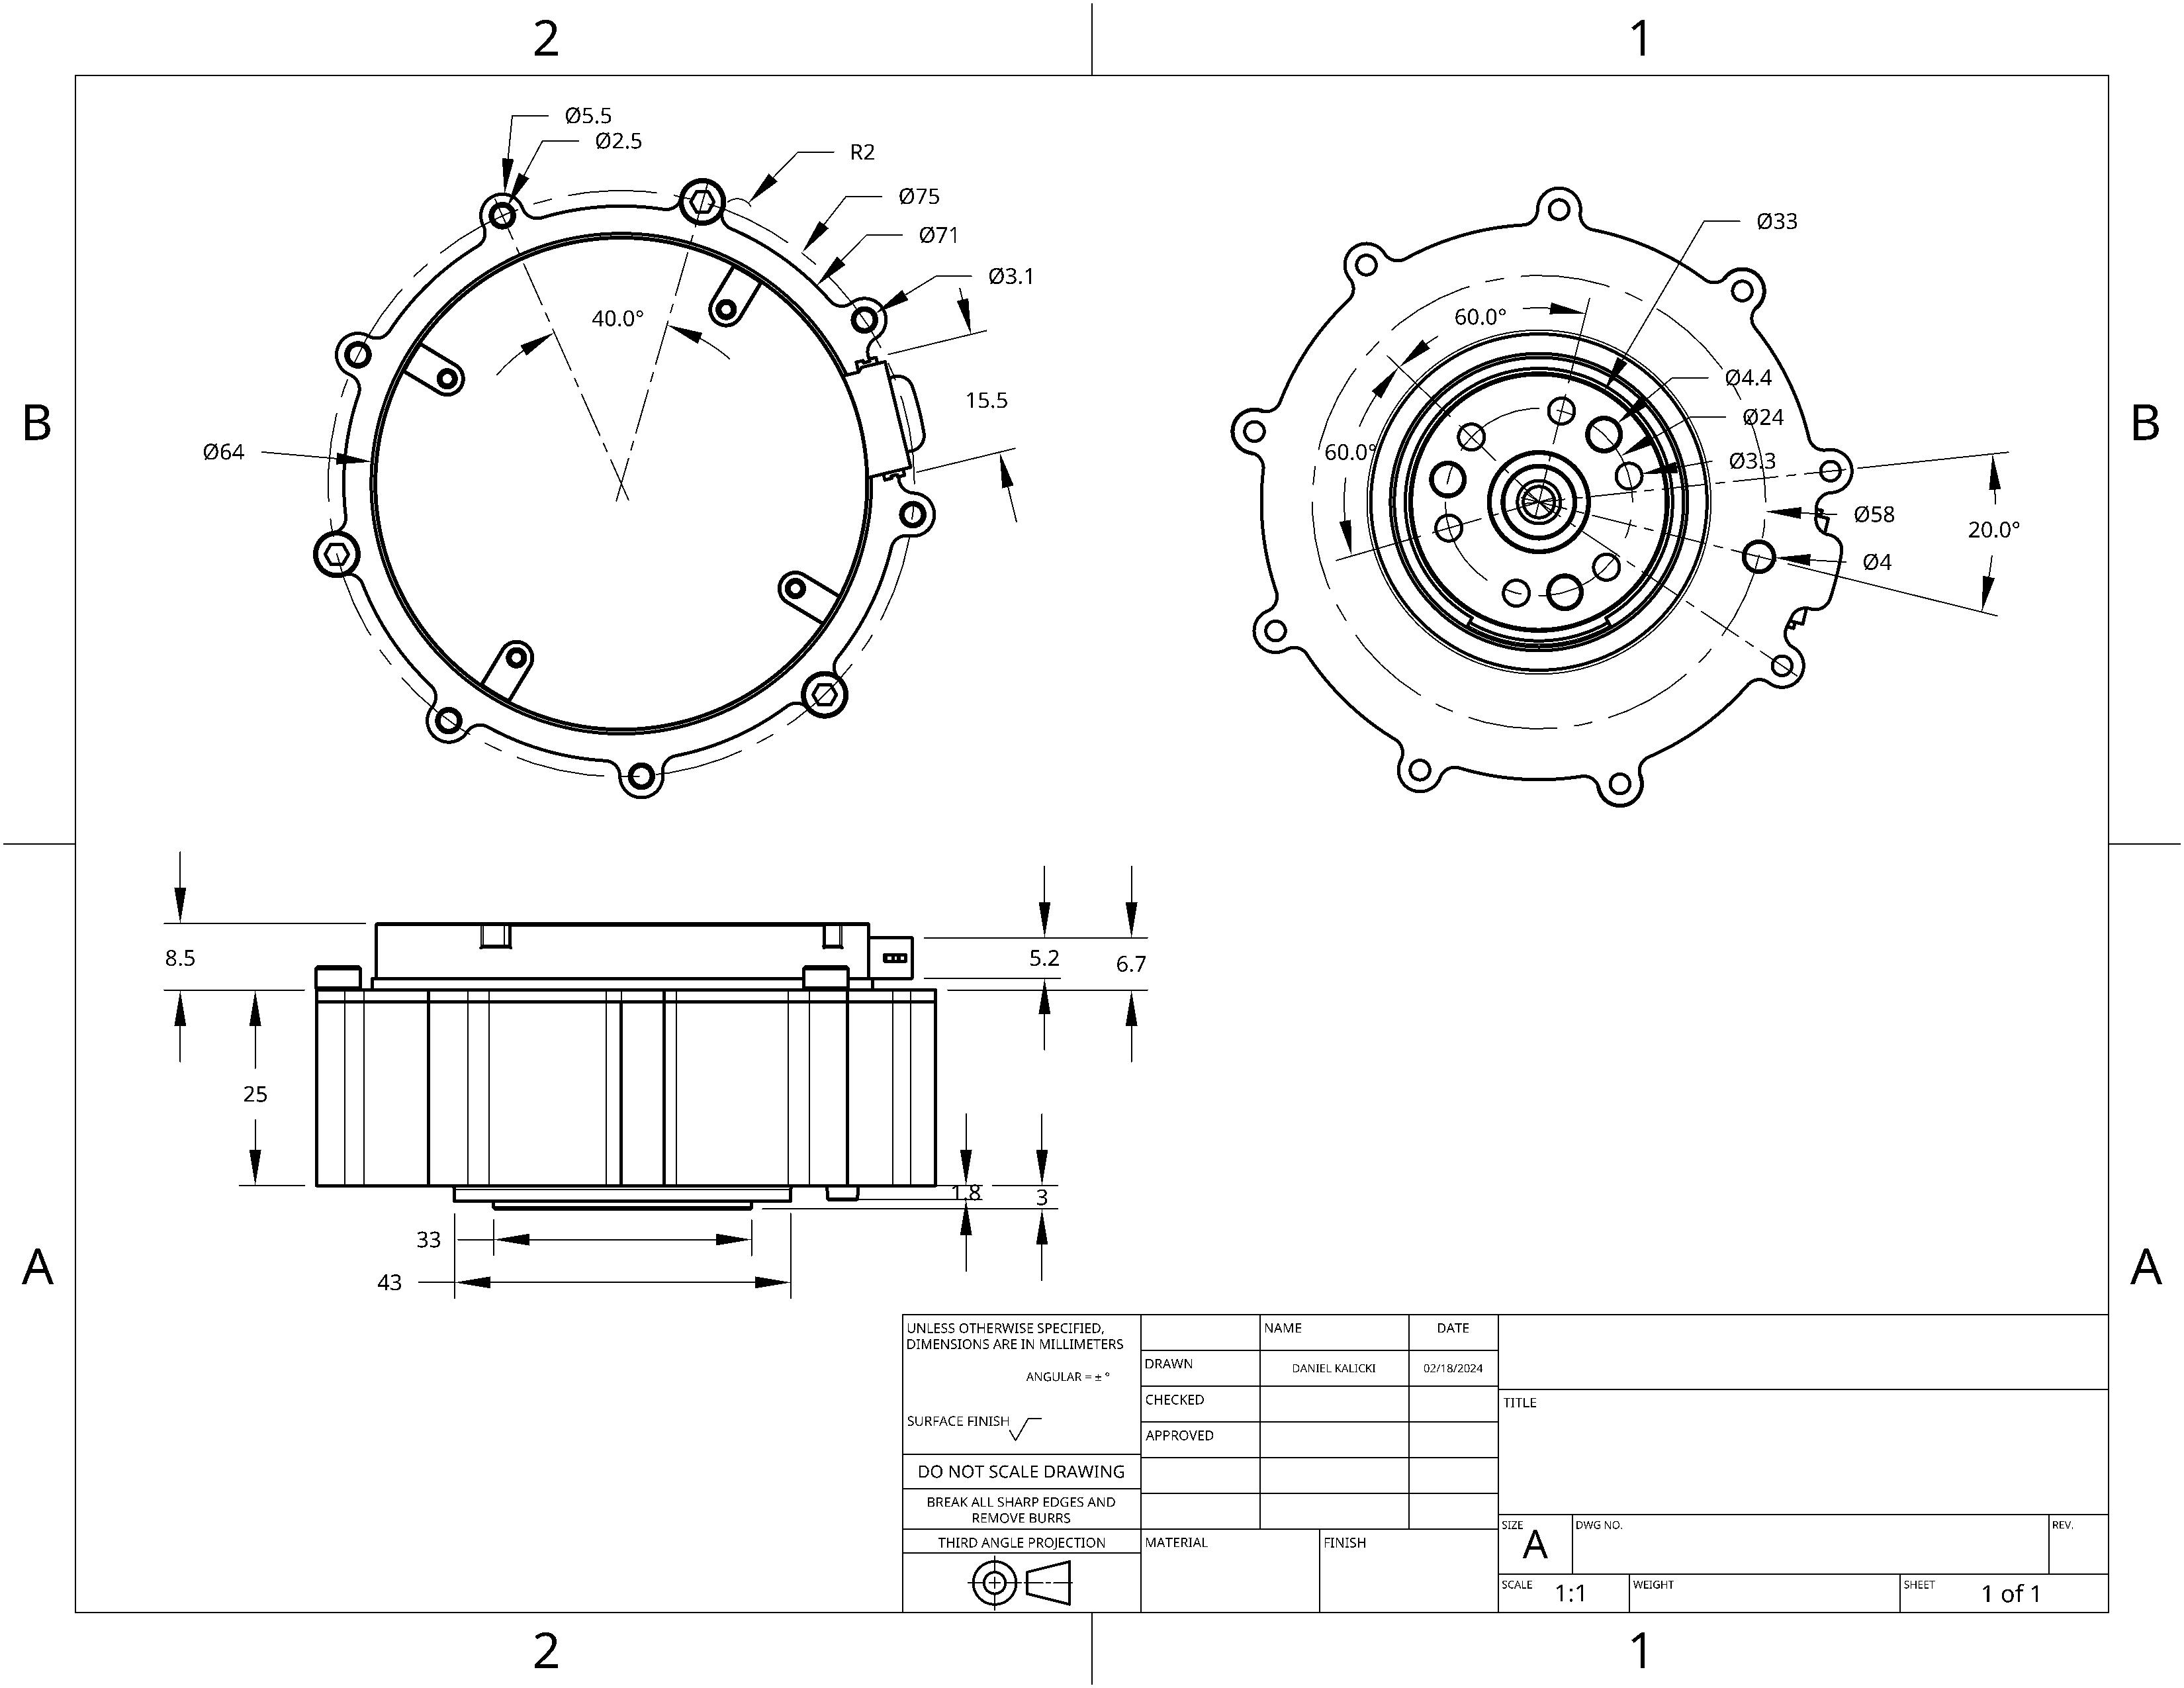
Xiaomi CyberGear technical drawing:
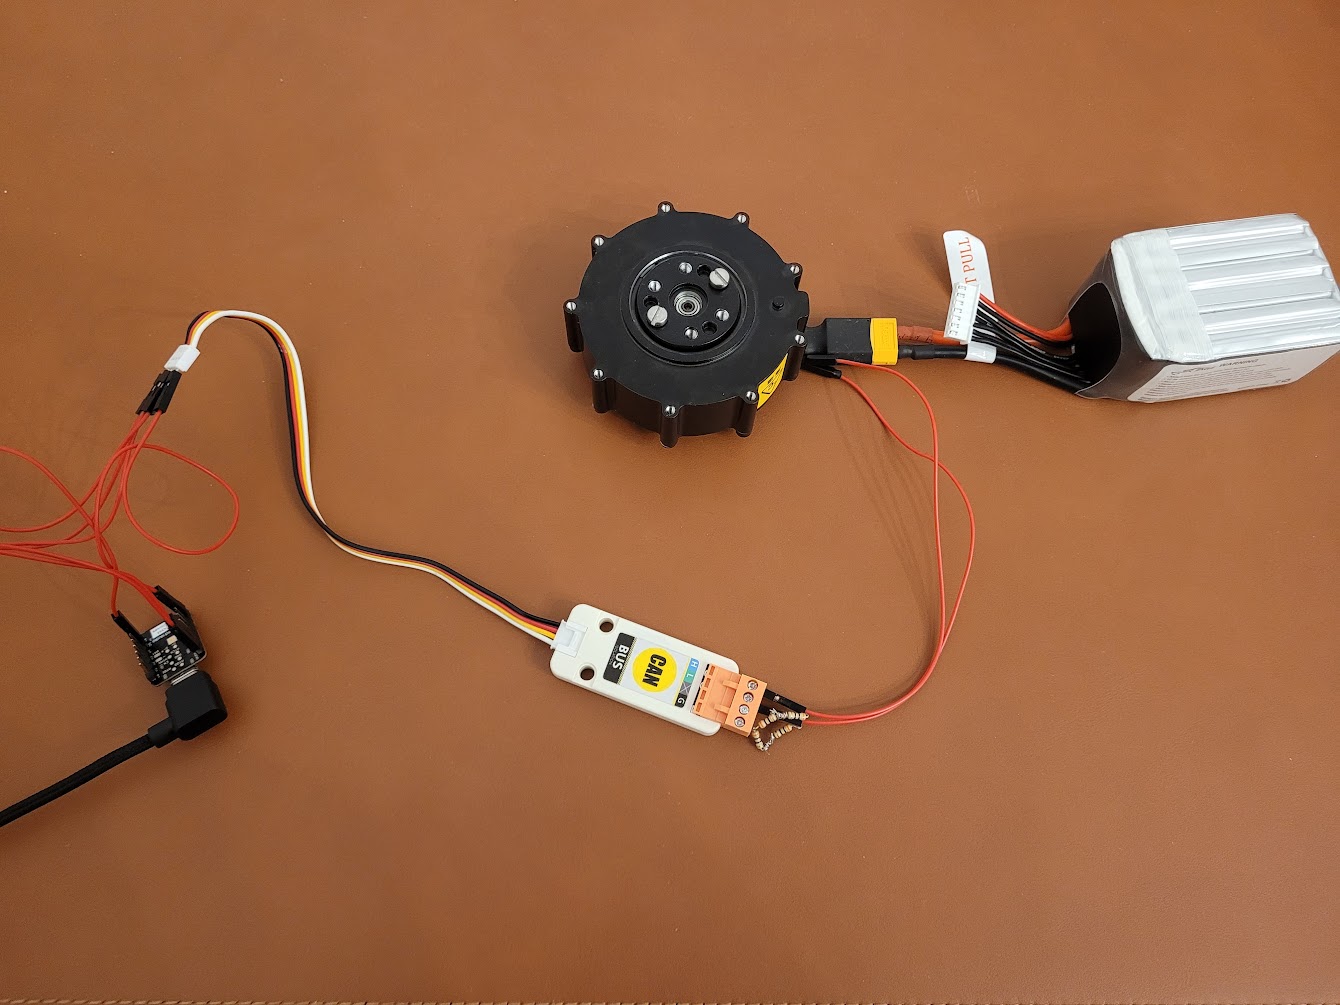
Tests were performed using:
- Seeed Studio XIAO ESP32S3 development board
- CANBus Unit (CA-IS3050G) as CAN transceiver
- Tattu 22.2V 1550mAh LiPo battery for motor power supply
Connections:
- ESP32S3 GPIO43 (D6) → CAN transceiver TX
- ESP32S3 GPIO44 (D7) → CAN transceiver RX
- CAN transceiver → CyberGear motor CAN interface
- Ensure you have the ESP Rust environment set up: https://github.com/esp-rs/esp-idf-template
- Build the project:
cd xiaomi_cybergear cargo build - Flash to the device:
cargo run
- Original C++ library: Xiaomi_CyberGear_Arduino
- ESP-IDF Rust bindings: esp-idf-hal
- Motor protocol documentation: https://github.com/belovictor/cybergear-docs