CodePen is a website that makes it easy to edit code and preview the results. Below are a couple of other tutorials which you may find useful before doing this one, as they outline how to use CodePen and one particular project using CodePen. This tutorial assumes you've played with code in CodePen and now want to publish that on GitHub Pages.
- 3 things you need to know about CodePen before using it to learn JavaScript
- Using JavaScript to pull data from the police crime API (or any other API)
If you don't have a project to export, you can always fork this one and go from there.
Once your CodePen project is ready to be published, you have a number of options:
- The Full Page View: this removes the 3 code editing windows and just shows your webpage, with a bar across the top showing the title of the Pen and the CodePen logo. You can access Full Page View by clicking on Change View in the upper right corner, and selecting Full Page View. You'll notice the URL is the same as before, but with
penreplace byfulllike so:http://codepen.io/paulbradshaw/full/JWzPmO/ - The Embed option: this is in the lower right corner and opens a window where you can find code to use to embed your pen on another website.
- The top area of this window allows you to specify the Theme (choose Light to make the header bar less intrusive), Default State and Editable State.
- The middle area shows a Preview of how the embed will look. Note where it says Toggle tabs below to affect what shows by default. Normally, the embed shows a split screen between code and result - but you can change this. Toggle the HTML button off (so that it is pale grey), and toggle the JS button off, but leave the Result button toggled on (dark grey) and you can just embed the result.
- The bottom area shows the resulting code that you can copy and paste into a webpage to embed it. There are 3 options here: WordPress shortcode (if you're embedding on a WordPress.com site); iframe; or HTML. Choose HTML in most cases.
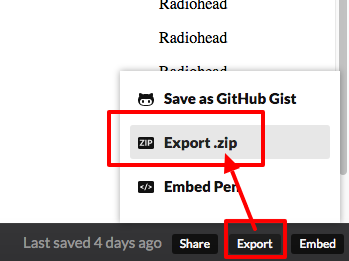
- The third way to publish your CodePen project is to Export it. The button for this is also in the lower right corner. This is what we're going to do in this tutorial. Click on that, and then select Export .zip
A .zip file should not download to your computer. If you unzip this, you should find a folder containing the following:
- A HTML file, called
index.html - A folder called
js, and within that a JavaScript file calledindex.js- if you wrote any JavaScript in CodePen - A folder called
CSS, and within that a CSS file calledstyle.cssif you wrote anything in the CSS window in CodePen - Two text files:
license.txtandREADME.txt. These both include information about the original CodePen URL and whether it was forked from another project.
These files can now be copied into a GitHub Pages repo to make a working website - although we may need to fix a couple things along the way.
If you've not already, create a GitHub repo with a gh-pages branch as explained here. Make sure you have switched to that gh-pages branch.
The new branch will copy across any files from the master branch. Make sure you delete the README.md file from this branch, because that will be used as a default home page and you don't want that - instead you want to upload your own.
With that deleted, you can now upload all the files from the folder that you just downloaded and unzipped
The quickest way to do this is to open the folder so that you can see the HTML file and two text files, plus the CSS and JS folders. Then click and drag to move them from your folder onto the repository.
The page should now change to show a list of those files, like this:
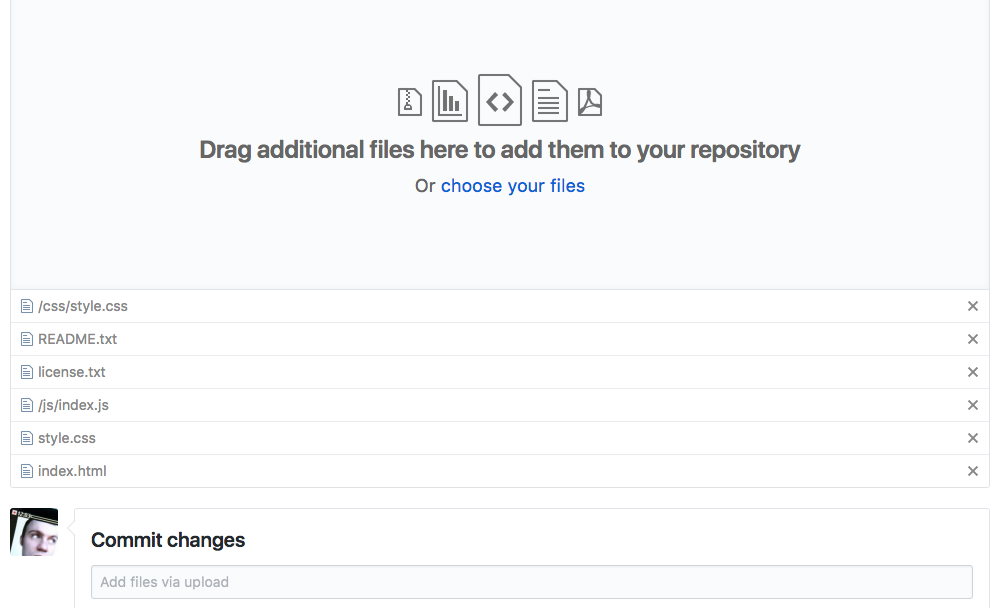
Make sure that you click the green Commit changes button at the bottom to confirm the uploading of those files.
Your repository should now have two new folders with those CSS and JS files inside, plus the other three files that you uploaded.
Because the HTML file is called index.html, it should automatically be used as the homepage for your GitHub page. You can now check it by going to the github.io URL for your GitHub Page (if you can't remember what this is, go to Settings and scroll down to the GitHub Pages section, where there should be a link)
If it's worked perfectly, great. If not, make sure you are still on the github.io page, right-click and select Inspect (or the equivalent on your browser).
This will open the Inspector which is great for trouble-shooting problems. Switch to the Console view.
The console shows you any error messages generated by this page in red. If there are errors that mention https, check the code of your index.html page (in GitHub and make sure all the links to scripts etc. use https rather than http.
For other errors, copy the error and search Google to find possible solutions.